Standard Shaders (PBR)
Neon Light Shader
Options relevant to the orels1/Standard Neon Light shader
Neon Light is partially based on the Glass effect which is also available in this shader package. Due to that, the "Glass" options will not be documented on this page. Refer to the Glass shader documentation to learn about them.
The main difference from the Glass shader, is that it is not transparent and also does not offer the blurred glass effect. It is generally aimed at providing a drop-in replacement for pure emission glow that is often used for neon lights, to add a bit more visual flair with the flickering and rim highlights and shadowing
Shader Overview
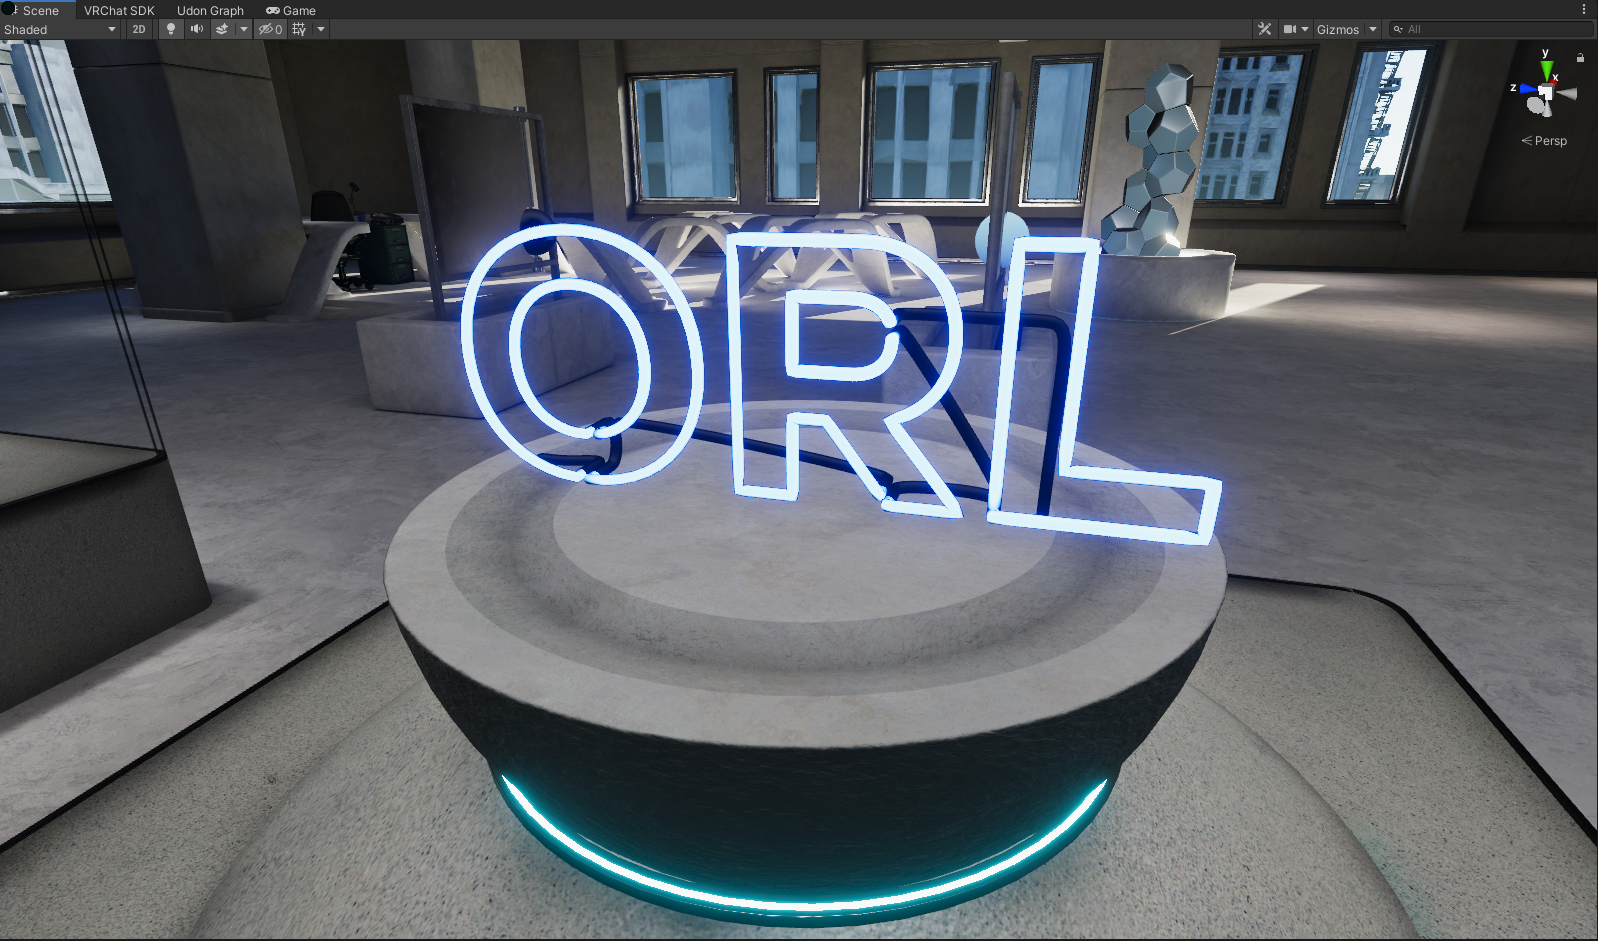 Neon sign from the Demo World
 Neon Light Options
Neon Light Options
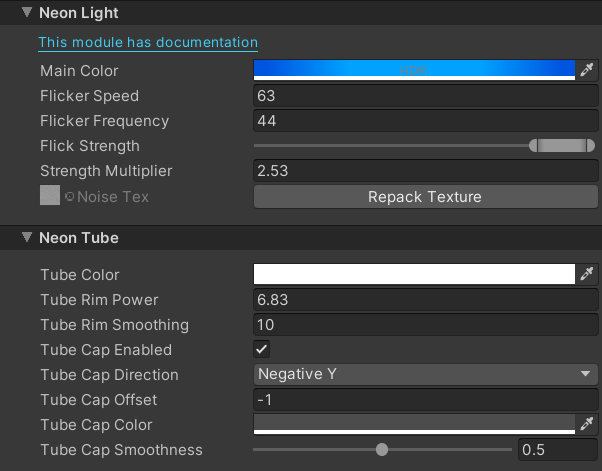
Neon Light Options preview
- Main Color: The main color of the Neon, will replace the Emission and Albedo/Color from the Main Settings
- Flicker Speed: Controls the overall flicker speed
- Flicker Frequency: Controls the cadence of the flicker effect. Hire values generally produce more randomized and harsh flicker, while lower values have a more smooth transition
- Flicker Strength: Controls the minimum and maximum intensity values the flicker can produce. E.g., if set to 0-1 (full range) that means that the flicker can make the neon go full black and full power. Generally speaking you want this slider to start at 50% and above if the flicker speed is high, while full range values are well suited for slow flicker, creating a "Breathing" effect
- Strength Multiplier: Allows the Flicker Strength values to go beyond 0-1 range
- Noise Tex: A special pre-baked noise texture. Not meant to be edited by user
Neon Tube Options
Neon Tube Options preview
These options simulate some behaviours exhibited by real neon lights, like the gas discoloration and the rim shadowing due to being inside of a glass tube. While not physically accurate, this should serve as a good enough approximation to sell the effect
Tube Color: The internal rim light color. Can be used to achieved the discoloration effect on the edge of the tube. See examples below
Tube Rim Power: Controls the expansion of the rim light effect used by the Tube Color
Tube Rim Smoothing: Controls the smoothing of the effect applied by the Rim Power
Tube Cap Enabled: Controls whether to add a black tube "cap" to the mesh. This emulates the way real neon lights hide the connecting tubes between the letters and the power source
Tube Cap Direction: Controls which direction to apply the effect from. It is done in local space, see examples below
Tube Cap Offset: Controls the position offset to apply the tube cap to
Tube Cap Color: Sets the color of the tube cap
Tube Cap Smoothness: Controls the smoothness of the covered tube part
Neon Cap Options preview