Standard Shaders (PBR)
AudioLink Shader
Options relevant to the orels1/Standard AudioLink shader
AudioLink shader, as the name implies, requires the VRC Udon AudioLink to be present in the world. This shader implies that you are already familiar with AudioLink and have it set up in the world
Hidden Options
Most of the AudioLink options are hidden by default and only show up based on the currently selected effect, thus this page is broken down based on the effect types
There is also a Cutout version of the shader available under "orels1/Standard AudioLink Cutout" name
Global Settings
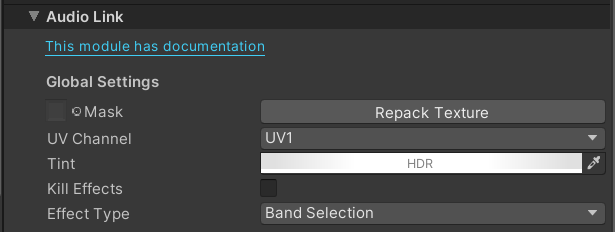
- Mask: A main texture mask used to mask-out the audio link effect on your mesh, uses the UV channel selected below
- UV Channel: Specifies which mesh UV channel (1-4) to use for the Audio Link mask and effects
- Tint: Global tint color. Some effects provide their own coloring options, in which case you want to keep the Tint white and use it to control intensity
- Kill Effects: A quick way to disable all effects, useful for animations / udon control
- Effect Type: Controls the currently active Audio Link Effect, available effects are documented below
Band Selection
Shows a single Audio Link frequency band across the whole object
Band Selection effect
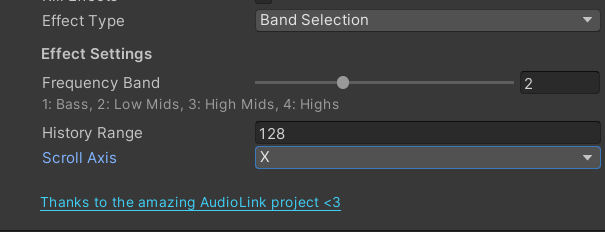
- Frequency Band: Controls which frequency band to sample. Options are: Bass (1), Low Mid (2), High Mid (3) and High (4)
- History Range: Controls the amount of Audio Link history to sample, visible as "Scale" of the effect
- Scroll Axis: UV axis to use for scrolling. Options are: X/Y/Negative X/Negative Y
UV Based
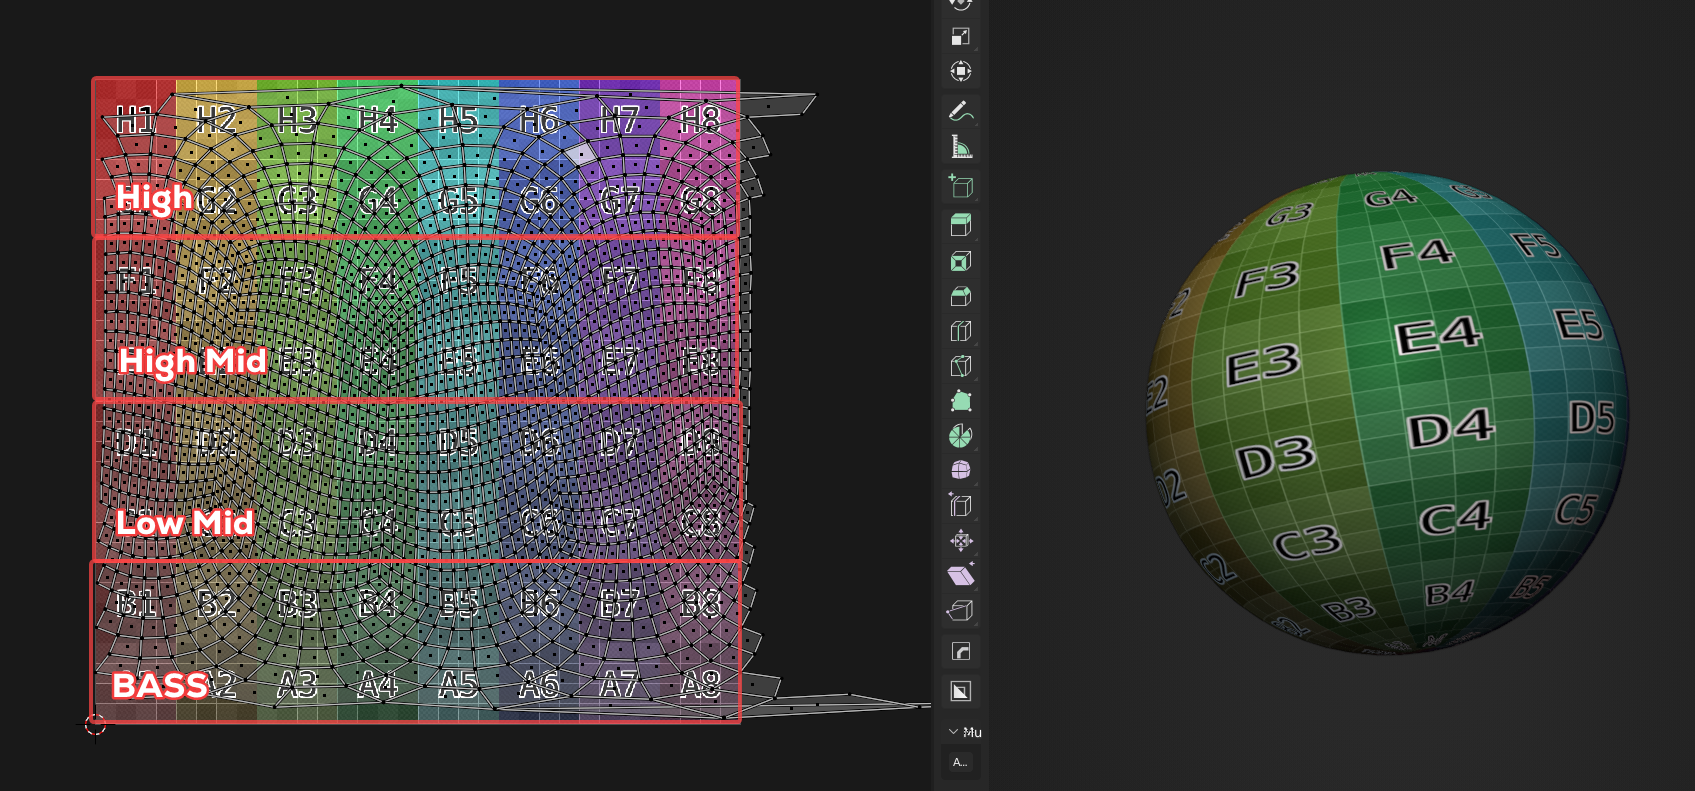
Similar to Band Selection but uses object UV map for frequency selection. This allows you to unwrap your objects in a specific way to show different frequencies on different parts of the model while still using a single material. See unwrapping reference below.
UV Based Effect Preview
Here's a rough UV layout example used in the video
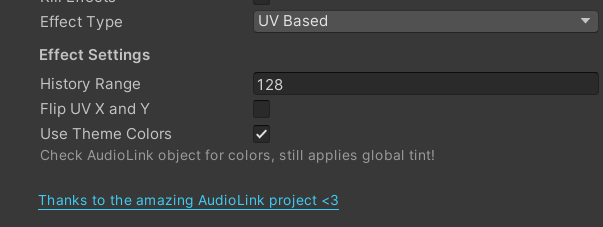
- History Range: Controls the amount of Audio Link history to sample, visible as "Scale" of the effect
- Flip UV X and Y: Allows to quickly flip the direction of the UVs. In practical terms - rotates the UVs by 90 degrees
- Use Theme Colors: Enables tinting by the colors specified on the Audio Link object. Still applies the global Tint on top
Waveform
Arguably one of the more sought-after effect. Shows a waveform of the current sound with a variety of extra effects
Waveform Preview
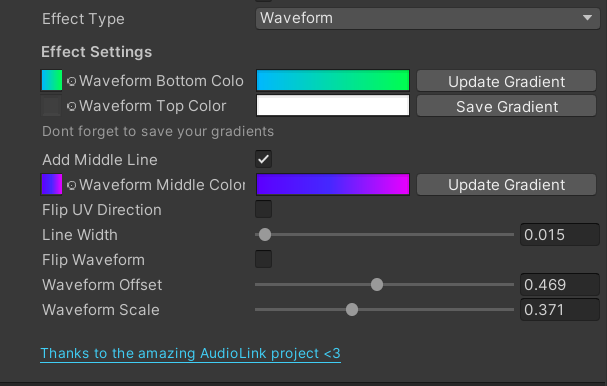
- Waveform Bottom Color: Specifies a gradient used for the bottom part of the waveform, which is the actual waveform of the current audio data
- Waveform Top Color: Specifies a gradient used for the top part of the waveform, you can think about it as the background color. If set to black - will show the underlying material.
- Add Middle Line: Adds an extra line between the top and bottom of the waveform
- Waveform Middle Color: Only visible when Add Middle Line is checked. Specifies a gradient used for the middle line
- Line Width: Only visible when Add Middle Line is checked. Controls the middle line width
- Flip Waveform: Vertically flips the top and bottom of the waveform
- Waveform Offset: The offset from top/bottom
- Waveform Scale: The vertical scale of the waveform movement
Save Your Gradients
Don't forget to click "Save" after setting up the gradients for them to actually be saved!
Bar
A "volume level" bar effect for the selected frequency band
Bar Effect Preview
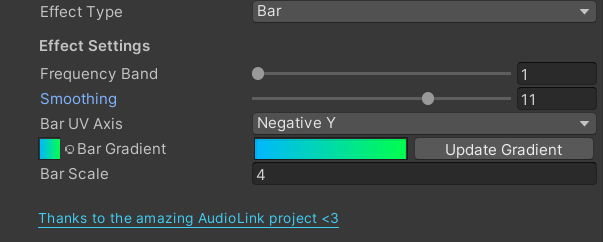
- Frequency Band: Controls which frequency band to sample. Options are: Bass (1), Low Mid (2), High Mid (3) and High (4)
- Smoothing: Controls the amount of smoothing to be applied to AudioLink data. Can help eliminate some of the "jitter" in the effect
- Bar UV Axis: Specifies which axis to use for the bar direction. Options are: X/Y/Negative X/Negative Y
- Bar Gradient: Specifies a gradient used for the bar, allows for creating a volume meter effect with the higher levels being colored in a different way
- Bar Scale: Controls the intensity of the bar movement
Pulse
Pulses the whole object with a color. Has an additional option to scroll a texture
Pulse Effect Preview
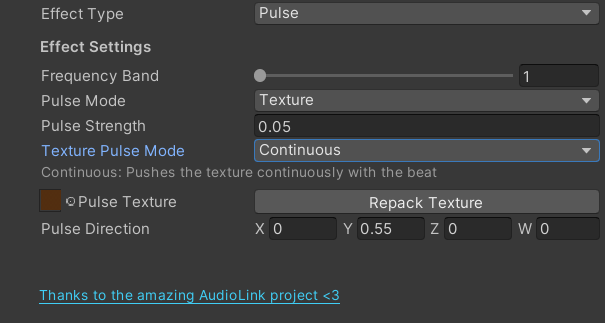
- Frequency Band: Controls which frequency band to sample. Options are: Bass (1), Low Mid (2), High Mid (3) and High (4)
- Smoothing: Only visible when Pulse Mode is set to Emission. Controls the amount of smoothing to be applied to AudioLink data. Can help eliminate some of the "jitter" in the effect
- Pulse Mode: Specifies one of the two effect modes
- Emission: Lights up the object based on the current intensity of the selected Frequency Band
- Texture: Adds a texture scrolling effect to the Emission pulse
- Pulse Strength: The strength of the Emission pulse effect
- Texture Pulse Mode: Only visible when Pulse Mode is set to Texture. Controls the movement behaviour of the Texture scrolling. See examples below
- Bump: "Bumps" the texture in a direction defined by Pulse Direction along with the beat
- Continuous: Scrolls the texture in a direction defined by Pulse Direction continuously
- Pulse Texture: Only visible when Pulse Mode is set to Texture. Specifies the texture being moved
- Pulse Direction: Only visible when Pulse Mode is set to Texture. Defines in which direction the texture is being moved. Only X and Y values are used
Here's a quick comparison of Bump vs Continuous texture pulse modes
Pulse Texture Modes Comparison